

Special Effects Makeup How-To
January 12, 2019
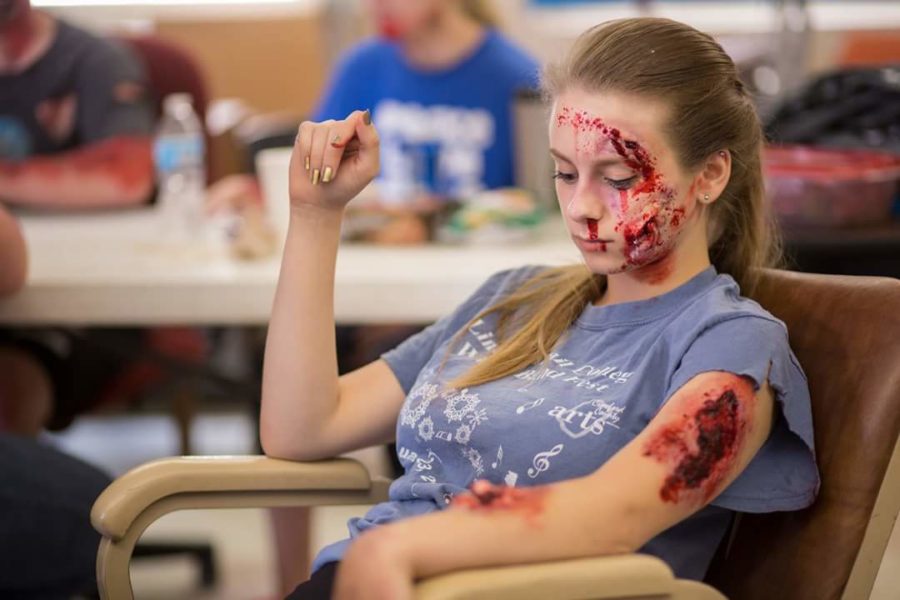
Makeup Looks Pictured Were Done By Senior Cheyanne Fenton
Special Effects makeup has been around since the beginning of theater and plays and has vastly improved and expanded over the years. The base of special effects is to create something that looks real but is not (such as an injury or a creature). I am going to guide you through a step by step process to create a small laceration (cut) using liquid latex.
The look will be completed by using a stretchy adhesive called “liquid latex.” Liquid latex is a milky white substance with a strong pungent odor that goes on milky white and dries clear (unless colored to do differently). You can find liquid latex online or in your local stores around Halloween. Be careful to not spill liquid latex, because it will not come out of carpet, clothes, and hair once it drys.
Ingredients you will need for this look: liquid latex, a small cosmetic sponge or applicator, 99% alcohol, 100% Acetone ( can be found by nail polish remover), q- tips, one-ply toilet paper, a sharp object such as a needle, a small pair of scissors, and face paints of desired color, then stage and scab blood.
Step 1.) Prep the desired area where you want the cut to go. Prep by finding an area where there is little to no hair (avoid getting latex in eyebrows or hair because it will rip the hair out) and then swab this area in 99% alcohol to clean any oils off your skin.
Step2.) Pour the desired amount of latex into a small (non-paper or Styrofoam) container, dip applicator into the latex and apply it directly to cleaned area.
Step 3.) Before latex dries put toilet paper on the latex and wait for the latex to absorb into the toilet paper, and before it turns clear, tear off excess toilet paper until the desired area is covered
Step 4.) Repeat step 3 three times after the latex on each layer is dry, but after each layer use the 100% acetone and a q-tip to blend the edges into the skin making it look just like your own skin.
Step 5.) Once all layers are dry and the latex is clear, cover the patch of latex and toilet paper with a paint color that matches the color of your skin (concealer or foundation works as well)
BE VERY CAREFUL ON STEP 6 AND 7!
Step 6.) Take the needle or sharp object and poke a hole in the latex about half an inch away from the end of the latex patch big enough that you can fit the tip of scissors into the pocket under the latex created by poking the hole.
Step 7.) Put the scissors in the hole and cut the latex to desired length or design but be careful not to cut completely through the latex patch and leave another half inch till the end.
Step 8.) After satisfied with the shape and size of cut you can begin to paint the inside of the cut. Use a darker red inside the cut to make it look deeper, add a light layer of dark purple or blue to the edges of a cut to make the opening look bruised, then add desired amount of stage blood (runny red blood) and scab blood (dark red thick chunky blood) to cut and around the cut till you are satisfied.
Then you are done! Take lots of pictures or terrify your friend but overall have fun!
To remove liquid latex just find the edge and peel it off of skin
